
Click below for a full screen walkthrough video.
▶️ Creating an Allowlist in Microsoft Exchange
Here are the domains you will want to allow.
CyberNut Allowlist
Part 1 - Mail Flow Rule Creation
Microsoft Exchange requires the creation of two separate Mail Flow (Transport) rules to ensure proper email delivery. The first rule, CyberNut Bypass Junk, should be configured to bypass spam filtering. The second rule, CyberNut Bypass Clutter Spam, should be configured to bypass clutter and additional spam filtering mechanisms. After both rules are created and enabled, navigate to Microsoft Defender and add all CyberNut sending domains currently used by the platform to the appropriate allow lists.
All CyberNut outbound emails originate from the following dedicated IP address: 34.226.146.241
Ensure this IP address is also included in any connection filtering or IP allow lists as required.
1. Log into the Exchange admin center at https://admin.exchange.microsoft.com/. Click on Mail flow. Click on Rules. Click Add a rule to create a new rule.

2. In the Name field, type CyberNut Bypass Clutter Spam.

3. Apply this rule if, select the "The Sender" in the first dropdown and then select "IP address is in any of these ranges or exactly matches" in the second dropdown.

4. Enter the IP address of the CyberNut email server 34.226.146.241. Click Add and then click Save.

5. In the Do the following section, select "Modify the message properties" in the first dropdown. Then select "set the spam confidence level (SCL)" in the second dropdown.

6. Leave the spam confidence level as Bypass spam filtering. Click Save.

7. Click the plus icon to add another modification.

8. Select "Modify the message properties" in the first dropdown. Then select "set a message header" in the second dropdown.

9. Click on Enter text to set the message header. Enter the value:
X-MS-Exchange-Organization-BypassClutter. Click Save.

10. Click on Enter text for the value and then type true in lowercase. Click Save.

11. Click Next, click Next again, then click Finish. Then click Done.
12. The rule is disabled by default. To enable the rule, click on Disabled and then enable the rule by clicking on the switch.

13. Once enabled, duplicate the rule and name it CyberNut Bypass Junk. Remove the spam confidence level settings by clicking the trash bin icon.

14. For the modify message property header, change the value to
X-Forefront-Antispam-Report.

15. Modify the value by clicking on true and then replace the value with SFV:SKI;CAT:NONE;. Click Save.

16. Duplicate the rule by clicking "Make copy" and then clicking "Duplicate".

17. Find and select the rule and enable this rule as well.

Please note that changes may take up to 24 hours to propagate. It's recommended to schedule email campaigns to begin 24 hours from the time of changes.
Part 2 - Microsoft Defender
- Visit Microsoft Defender at https://security.microsoft.com/
- Select Email & Collaboration > Policies & Rules on the left side of your screen.

- Click on Threat Policies.

- Underneath the Rules’ section, click on Tenant Allow/Block Lists.

In the Domains & Addresses tab click on + Add>Allow.
- In this section, we’ll specify all of our domains from this worksheet.
Note: We can only add 20 domains at a time, so you’ll need to split these up and redo this step until finished.
- Once repeated for all domains, you should have a list of allow-listed domains.

- Next, go back to the threat policies page by clicking Policies & Rules in the left navigation bar underneath Email & Collaboration.

- Click on Advanced Delivery.

Then click on the Phishing Simulation tab. Then, click on Edit.
- Under Domain, copy and paste every single domain from this worksheet. (You have to do this one by one. There is no way to bulk add these domains unfortunately.)

- Under sending IP, add our sending IP address 34.226.146.241 and then click Save.

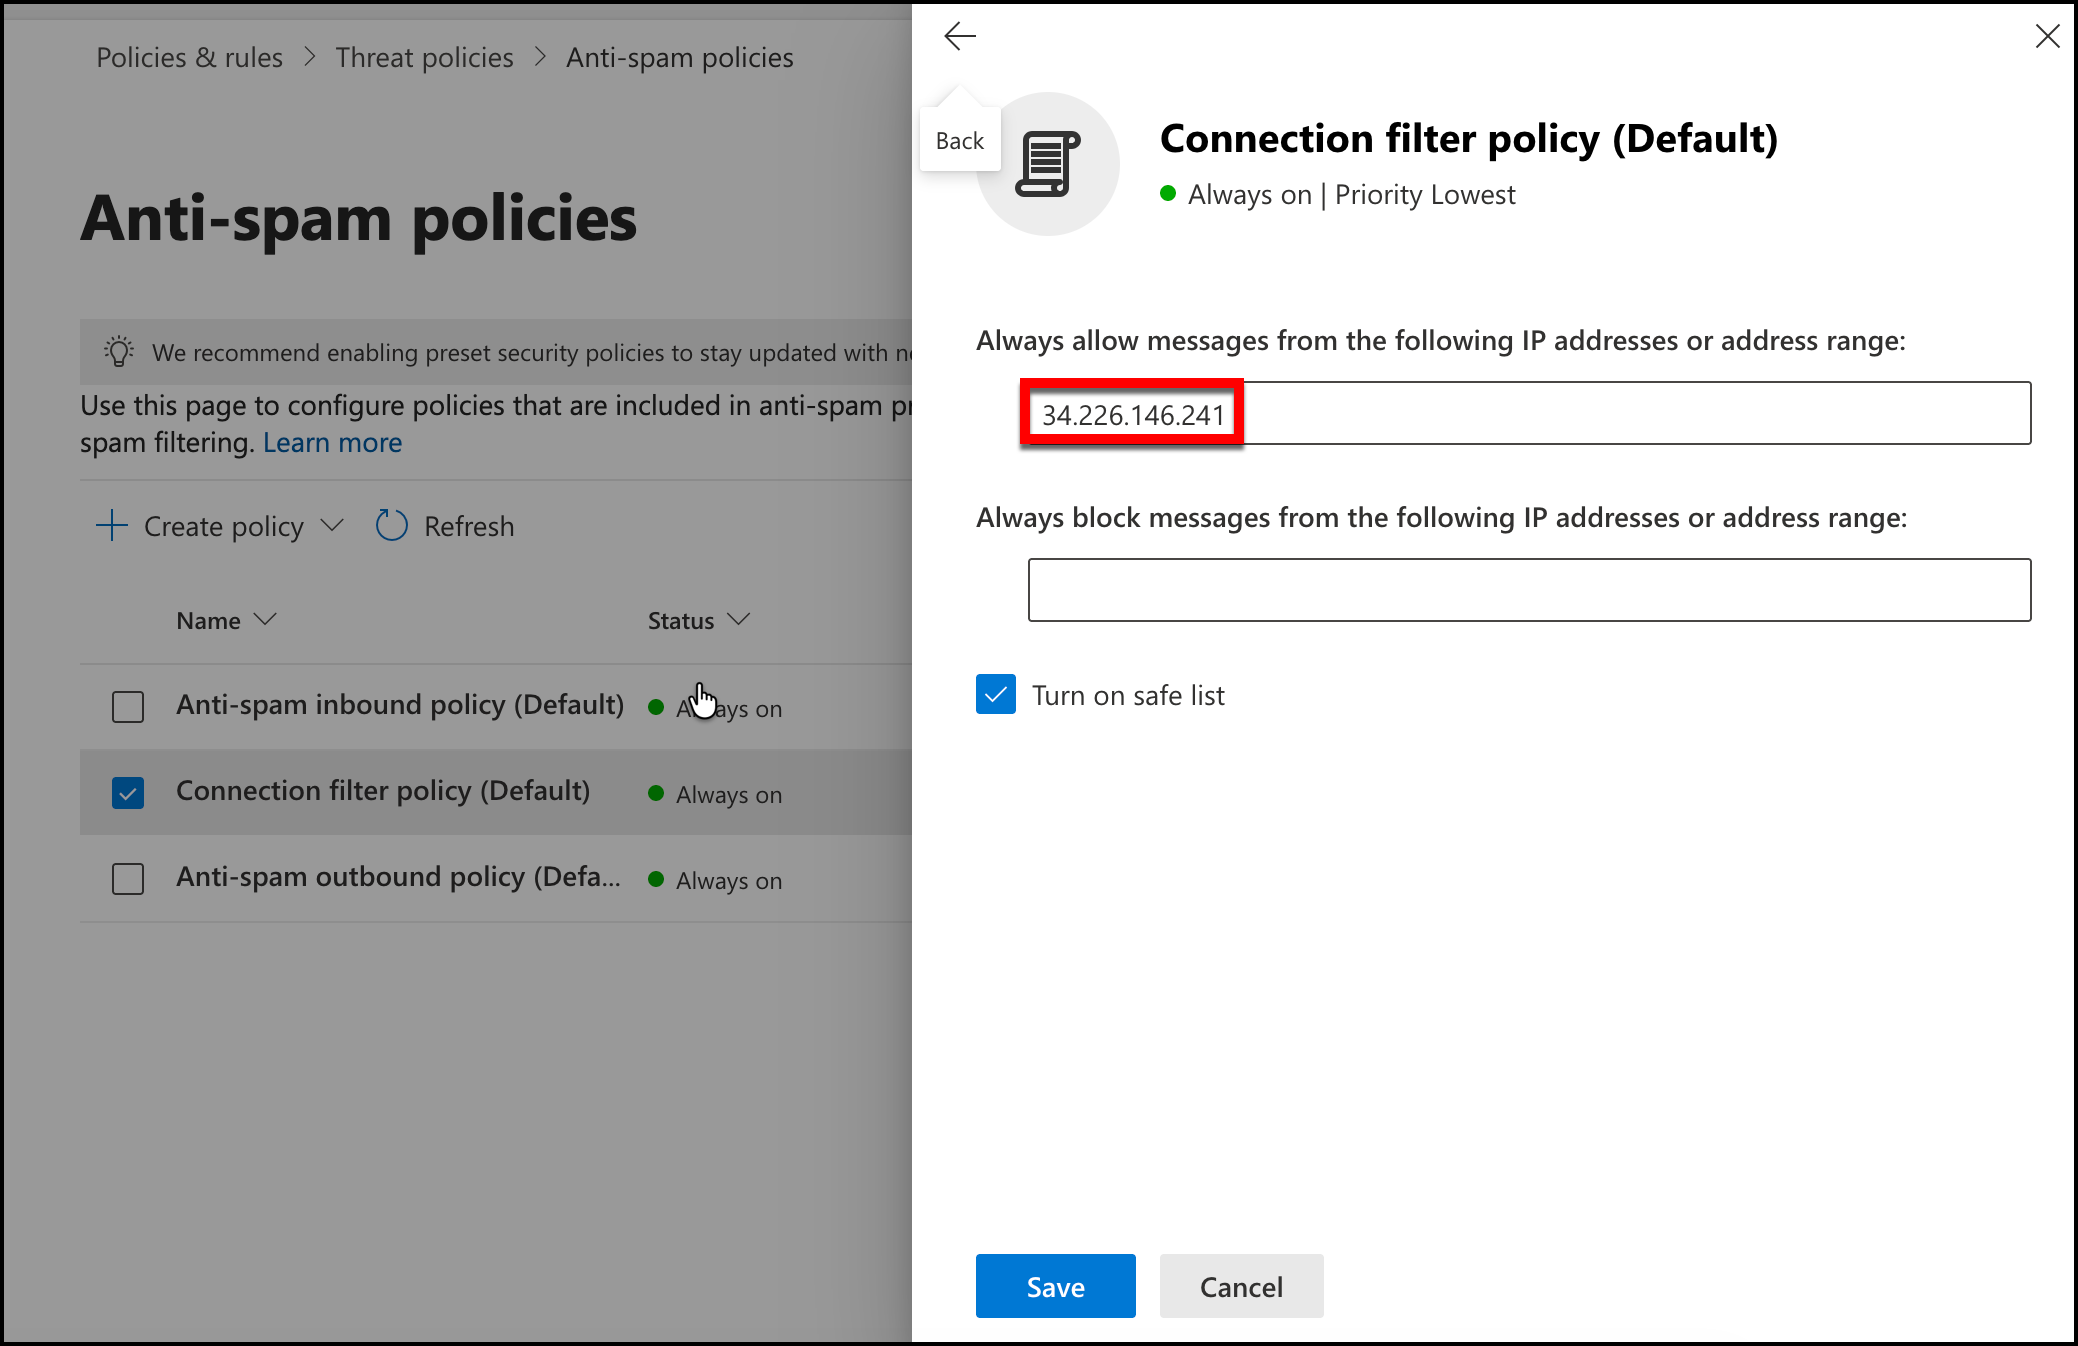
- Lastly, go back to the Threat Policies page and click on Anti-Spam.

- Click on the default Connection Filter Policy and then Edit Connection Filter Policy.

- Click Edit connection filter policy and add our sending IP address which is 34.226.146.241 and ensure that Turn on safe list is on.
Part 3: Allowlisting
Within the CyberNut Admin Portal, verify that the email delivery method is set to Email and not Direct Mail Injection.
Selecting Email ensures that messages are sent using the standard SMTP delivery method. This allows emails to pass through the recipient’s normal mail flow, filtering, and security policies.
The Direct Mail Injection option bypasses the traditional email routing process by injecting messages directly into the recipient’s mail environment. For standard deployments and proper filtering control, this option should not be used unless explicitly required.
- Visit the CyberNut Admin Portal at http://admin.cybernut.com
- Click on Settings→General.
- Under Email Delivery Method, set the dropdown to Email.

- Scroll down and click Save.
Please note that changes may take up to 24 hours to propagate. It's recommended to schedule email campaigns to begin 24 hours from the time of changes.